Hi!
No school today or tomorrow for the kiddos. It's a super long weekend!
Today I'll share the master bedroom ceiling. What's so great about a ceiling? Well, I stenciled it!
(This is the corner above the bed)
A while back, I found this ceiling at Not Just a Housewife. I thought it was a great idea! So I made my own stencil and set to work.
But before I got to work, we had to re-do the ceiling (and roof!). Here's how it started out when it was the living room.
Or rather, after we started tearing down the old ceiling in Sep 2010. The door is where our headboard is now, in front of a window that replaced the door.
Here's another view of the old ceiling. This is where the hallway is now. We had used paneling and tongue-in -groove boards to hide the seams. I must've been pregnant or something because it seems HH primed the paneling with oil-based primer and I used latex to finish.
Oops, here we have no ceiling or roof!
Ah, a beautiful sky! :-)
Here's a bird's eye view looking down into the future master bedroom.
(Here's some pictures of the outside: :-))
Back inside, here's looking from the door (future window) into what will be the bedroom and hallway.
Here the roof is starting to get back together.
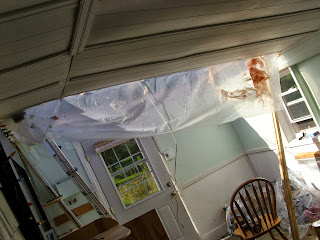
All insulated and plastic-ed. And look, the first sheet of drywall on the ceiling!
Here I am taping up some more plastic by the hallway, where the laundry closet will go. (That mirror stayed from the living room to our bedroom, but we did have to move it over about 6 inches. HH brought that up from a PA (I think) Ikea on the roof of our car. It ended up cracking the windsheild!)
More drywall! Looking good!
So, evidently I didn't get any pictures of the actual painting of the ceiling. But it went something like this:
1.Prime.
2. Paint with leftover paint from old master bedroom (now DS's room) and old living room.
3. Make stencil on plastic desk protecter from Staples. ( I copied image from somewhere and HH made a copy of it for me so I could trace it out. However, the pattern was way too small.
So he had to go back and get it enlarged. Here it is on 4 big sheets with the smaller pattern beside it.
I got a bigger desk protector to draw the stencil on and cut it out.
FYI, I ended up using the old desk protector with the small pattern drawn on it but not cut out for the stencil I just used on the front room floor!)
4. Use spray adhesive to hold stencil on ceiling and use foam roller to roll on paint from the Restore.
Here's how it looks from the bed:
I like how the stencil goes around the angles. This is from the hallway where our door opens into a taller section, then goes into the cozier lower angled ceiling.
Here's the bedroom again with just a peek of the ceiling.
It's fun to look at the old pictures and see how much progress we've made! :-)


No comments:
Post a Comment