Showing posts with label Craft. Show all posts

Wednesday, 15 February 2017

Valentine's Day

Hi!
We are finally getting some winter here!  
We had two more snow days on Monday and Tuesday

We're expecting another 25 cm (9 inches) overnight tonight! 

Funny snow drift in the front corner of the house. 

C and I got our Valentine's stuff out on Monday.


I didn't have a special meal planned for dinner, but with a table cloth and the nice dishes, the fish curry turned out nice. 

During the snow days, I got into making some cards.  This one, I made the outside in 2012, 

But, I did the inside this year! 
Actually, that was just a test one, but it turned out ok, so I gave it to K. ;-)

When I did cards for the kids, I kept the outside simple.

So the inside would shine!

(FMI (for my information) I used watercolor paint for this and found it was a bit runny.) 

Enjoy the rest of your week! :-)

Monday, 9 January 2017

Initial Sign (Kreg Jig Project #5)

Hi!

So, I've got one more Christmas post!
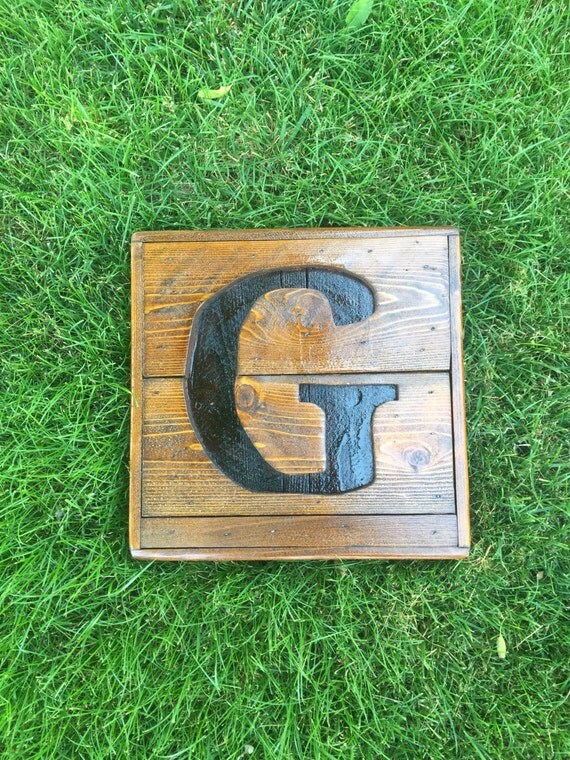
Before K went to his sister's in October, I made her and her new husband a wooden sign with the letter "T" (the first letter of their last name) for Christmas.

I found this on Etsy, and used it for my inspiration.
Recycled pallet initial sign- Wooden Letter sign- Monogram sign- Gift for home- Rustic decor- Wood pallet sign- personalized wedding gift

I started with some old aged cedar boards we had hanging out in the back of our yard.
I sanded, cut and joined them together with the Kreg Jig.

I printed out a big "T", 

traced it on the wood, and cut it out using a jig saw with a fine-cut blade.
Then I stained it using minwax stain- the same stain I used on the Wooden Dice- and yes, it's still stinky!

At this point I had made another piece of 1x4's for the back, which I was going to attach with the boards going vertically instead of horizontally.  However, the wood is actually 1 inch thick and I thought that made it too thick.

So, I found some already painted thin (3/8"?) plywood to use for the backer.
Here's the leftover pieces. 

I had to stain the sides and edges so the white paint wouldn't stand out so much. 

I put Gorilla wood glue on the back of the letter sign and glued it to the backer.
Then I nailed a saw-tooth hanger on. 
Here's the final product. 


I also made a quick "Joy" sign for myself out of part of an old door and chalk.
I put it on top of our last year's calendar.  (Since I wasn't using the pictures that came with the calendar.  It was a "Milk" calendar with recipes.)

Now, I've got a new calendar with pretty pictures, so I put the Joy sign in the front room.

Have a great day! :-)


Thursday, 5 January 2017

Bookmarks


Hi!

For 2016's homemade gifts for the kids, I made cross stitched book marks.

I used this tutorial.

And got inspiration from these:
Inline image 2Inline image 1

I gave them with (second hand) books. 


In case you're interested, here are my previous gifts:


(Plus Little Owl for N 
and bracelets for C)


Have a wonderful day!
:-)


Tuesday, 5 January 2016

Wooden Dice

Hi!

I've got one more quick Christmas post for you!
It's the wooden dice I made for the kids for their homemade Christmas gift.


Back in December, I wrote about dying some fabric.  Besides the blue jeans, I also dyed this bag.

I used it to hold the extra large dice.

I made them from this tutorial

I cut up some leftover cedar 4x4's, sanded and sanded them, and waited for a special 5/8" Forstner drill bit to arrive from Home Depot.  It arrived, but when I went to drill my wood, it was too soft (?) and the holes weren't crisp.  So, I just painted the dots on with craft paint after staining the dice with super stinky Minwax stain.  Remind me next time to use a more natural stain (or no stain at all)- that stuff was way too toxic to use on a toy.  In order to keep the dots on and seal up the stinkiness, I sealed it with ModPodge.

Back to the bag, I found a nice font online and printed letters to spell "DICE".  I cut out the letters from some leftover denim and used this Heat n Bond to attach them to the bag. 

C  and her cousins (K's first cousin's kids) played a version of Yahtzee with the dice on Christmas Day, so that was fun.  
I hope they get some good use this summer!

Have a great day and fantastic week! :-)

Wednesday, 23 December 2015

Metal Christmas Ornaments

Hello!
It's the first day of Christmas Vacation for the kids!  We awoke to a winter wonderland.

C had her school Christmas Play, "Where Is Christmas" on Monday. It was quite a nice performance, with their new music teacher this year.
C is on the bottom row on the right.


I'll take a little break from posting for a few days, but wanted to get one more Christmas post in before the actual holiday!

I've made lots of wooden decorations for Christmas: tree holderswreathswooden trees and snowmen and a cross stitch ornament.

Well, I've finally branched out (haha) and made something new!

Metal decorations!

I've saved these frozen juice container lids for a long time.

It was a mild day, so I got out the spray paint,

And some stickers, 
and came up with this. 

These were my test ones.

I put a black coat on the bottom lid and then put the stickers on to spell NOEL.  After spray painting again with the shiny silver, I took the stickers off to reveal the word. The top lid just got stickers and silver paint so the word is a bit more subdued.

After seeing this, I decided the shiny silver looked too much like the original lid, so I switched over to a Hammered finish.

C helped think of Christmas-y words (along with K) and put the stickers on.

Here are all the stickers we pulled off. 

And here are the cute ornaments! 
After seeing the Hammered finish, I went back and re-did some in the shiny finish so there's a variety.

Here's another "set". 

Here's one hanging on our tree.

Merry Christmas! :-)